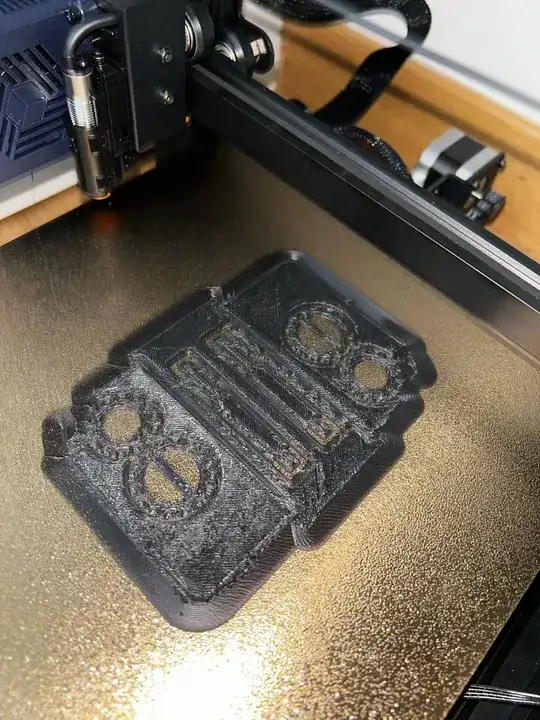
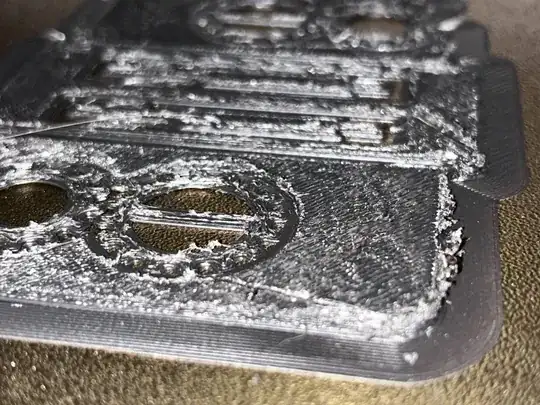
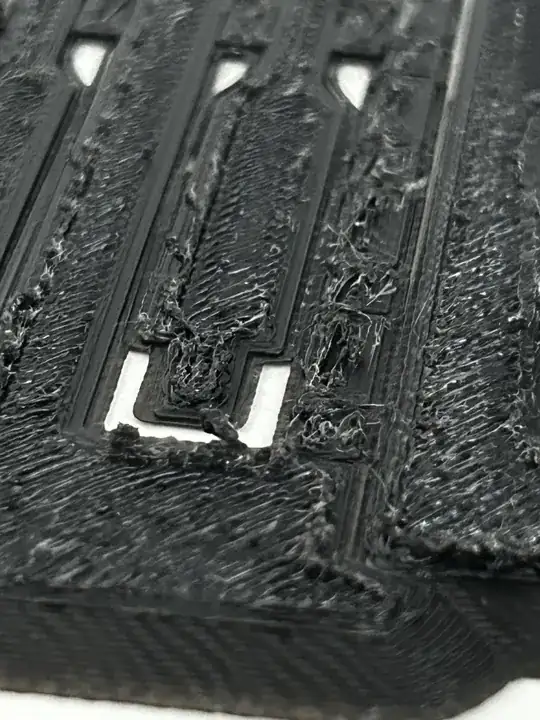
This looks like over-extrusion on the first layer. There are a number of reasons why this could be happening, but usually, it's because the nozzle is too close to the bed. The link posted is a huge resource for getting a decent first layer.
You'll need to tram or level the bed. (Tramming is the proper term, but the two are used interchangeably) To do this you can follow the guide in the link provided, though I'll also type my personal process out here if you want to read it twice.
You'll need:
- A piece of regular printer paper
- A way to interface with your printer, the normal control screen is fine
- Your printer
- I like to have a light shine behind the printer as I do this, it's not necessary
- You can replace the piece of paper with a set of feeler gauges if you have them, we'll use the 0.2 mm one.
To properly tram the bed:
- Home the X, Y, and Z axes
- Move the print head/nozzle/hotend to the back-left corner.
- Set the Z-axis height to 0.1 mm, this is the average width of a piece of printer paper. Or, if you're using the 0.2 mm feeler gauge, set it to 0.2 mm.
- If your bed sits higher or lower than your printer expects (for example, if you've replaced the stock bed) you may have to set this higher or lower to compensate for the width of the new bed.
- Slide the piece of paper under the nozzle, in between it and the bed, and slowly adjust the knob until you feel some resistance while sliding the paper. You don't want a lot of resistance, just a little scratchy feeling is what you'll want.
- Repeat step 5 for the back right, front right, and front left corners (in that order).
- Go back to the back left corner and re-do the paper process again for all of the corners a couple more times, just to make sure it's well within the range.
- Validate your tramming with a bed level test. This will show you if your corners/center are within tolerance or not, so you know where to make adjustments.
Lastly, here's a resource for some of the more common problems FDM printers face. I hope this wasn't a massive info dump, all at once, and that this helps you resolve the issue you're having!


